Email Settings
Domain Registration
Registering a Domain
Registering your project’s domain increases email deliverability and helps ensure your emails reach your contacts. To register your domain, navigate to Settings → Communications and click the Registered Domains tab. Enter your domain and click Register.

Remember, an email domain is not a website, so do not enter www. Only enter the text that appears after the @ symbol in your email address.
If a domain has already been registered on the company level, you will also have the option of selecting from an existing registered domain. You can use the same domain on multiple projects and you only have to verify it once.
Verifying a Domain
If you are not using a previously registered domain, you will need to verify the new domain. Click on the Required DNS records to view them, or refresh the page if this section didn’t immediately populate. To send the DNS records to your network administrator, click the micromenu at the top right and select Send DNS Records. Enter an email address and click Send DNS Records.

Note that sending the DNS records does not itself verify the domain; your network administrator or hosting provider must add them to your domain. Here are a few common ones:
- GoDaddy (Note that GoDaddy may automatically add your domain to certain DNS records, requiring you to adjust the Spark-provided hostname. Contact us at support@spark.re if you are unsure how.)
- Cloudflare
- Namecheap
- DigitalOcean
- Google Domains
Is this a new domain? Don't forget to warm it up before you start sending large campaigns!
Changing a Domain
To change the domain, click the micromenu and select Change Domain. This will unregister the current domain from the project and allow another domain to be registered.

Deleting a Domain
To delete a domain from the project, click the micromenu and select Delete Domain. This will permanently destroy the domain, reverting any projects that may be using it to send through the default Spark domain. Because this action affects all projects using the domain, it should be undertaken with care to ensure the domain is not unregistered from a project that should still use it.
Disclaimer
To adjust the default disclaimer that is appended to the bottom of each email template, navigate to Settings → Communications and click on the Disclaimer tab. Enter the desired disclaimer text and click Update Disclaimer to save the new text.
Note: Updates are applied to new email templates only, not applied to existing templates. If the disclaimer on an existing email template must be modified, it can be edited in Carpenter.
Sending Email Addresses
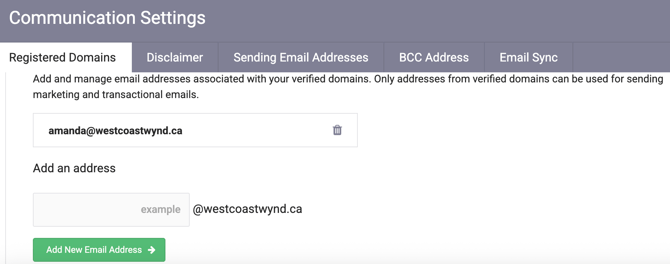
To send email campaigns from specific email addresses (and receive replies to those addresses), navigate to Settings → Communications and click on the domain to expand it if it isn't already.
In the Sending Addresses section, type the address in the Add an address field. Click Add new email Address to save the email address.

To edit an existing email address, click the micromenu next to the address and select Edit. Make the desired changes and click Update email address to save them.
To delete a sending email address, click the micromenu next to the address and select Delete.
Multiple email addresses can be stored within Spark if you send campaigns or transactional emails from more than one address.
BCC Address
If you are sending emails outside of Spark, you can use our BCC email feature to ensure that these interactions are still logged. Navigate to Settings → Communications and click on the BCC Address tab. Note that BCC addresses are project specific, so if you have multiple projects on the go, you will have a different BCC email address for each project.
By including this email address as a blind carbon-copy on any emails sent from your Spark login email to any contact email currently registered on that project, a copy of that email will also be created on Spark in your Outbox and an email interaction will be automatically logged by you for that contact.