Watch the video tutorial or see the following articles for more information about creating specific parts of an email template:
- Creating a New Email Template
- Updating the Header and Footer
- Building the Body the Email
- Email Template Section Settings
- Previewing & Testing Email Templates
Creating a New Email Template
To create a new email template, navigate to Menu → Emails → Templates and click New Template. Choose the email category and click Create.
| Category | Description |
| Marketing |
For marketing campaigns, auto-replies and general procedural emails. Merge tag options are limited to first and last names and the project name. |
| RSVP |
For RSVP event campaigns. Merge tag options are limited to first and last names and the project name. Invitation and Thank-You email templates are automatically created when an RSVP event is created. It is a good idea to edit these automatically-generated templates instead of starting from scratch since they contain the basic building blocks needed for an RSVP email and are pre-populated with information about your event. |
| Contract/Transactional | For reservation- and contract-related emails. In addition to the general contact merge tag options available for marketing templates, transactional email templates have merge options pertaining to the reservation/contract, including demographic information, dates, pricing and deposits. |
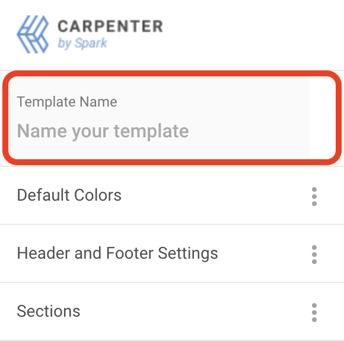
Once the email template category has been determined, name the template by typing the name in the Template Name section.
The basic structure of an email template is a header, the body and a footer. Within the body, different sections or components can be added to build a complete email. By default, a new template contains the project name in the header, an image section and a text section within the body, and the company address and disclaimer within the footer. The footer also contains an unsubscribe link that cannot be removed.
Updating the Header and Footer
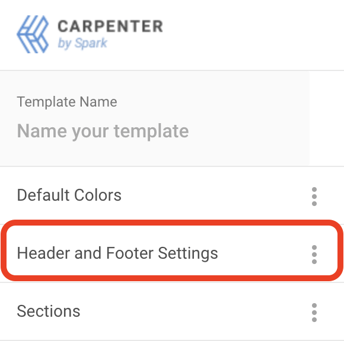
Before beginning to build the body of your email template, it is good practice to review the header and footer. Click Header and Footer Settings in the menu at the left of the page.
The following customizations are available:
| Name | Description |
| Header Text |
Also known as pre-header text, this is the preview text that appears in recipients’ email inboxes. It is a good idea to include a text descriptor in this section since the next section is likely a project branding image (such as a logo or digital letterhead) which will not appear as a preview for your recipients. By default, this will be pre-filled with the project name, but it is best practice to customize the header text for each email template to give a more descriptive preview for recipients. |
| Header Text Color |
Enter the hex code for a project-specific color or use the color picker to choose a new color. |
| Footer Link Labels |
For compliance purposes, the footer links (which contain and unsubscribe link) are automatically included in all email templates and cannot be removed. Choose to display these links in English or in French. |
| Company Address |
By default, this is pre-populated with the company address. Depending on your company’s preferences, you may wish to change this section to your project or presentation center address instead. |
Building the Body of the Email
Setting Default Colors
If you plan to modify the default background and text colors for your email template, it is most efficient to modify them for the entire template instead of adjusting each section.
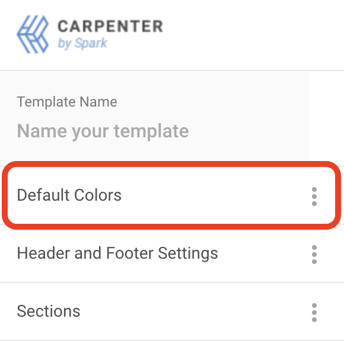
Click Default Colors in the menu to the left and either type the hex code or use the color picker to choose the desired colors.
Adding Sections
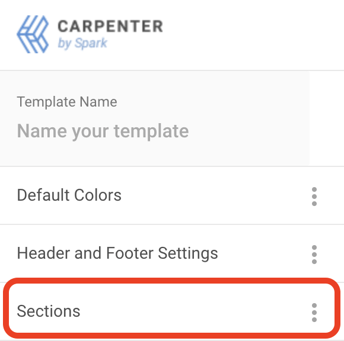
Use the Sections section in the menu to the left to add as many sections and types of sections as your email requires. To rearrange the order in which they appear, click on the section and then use the Move arrow to its left to move it up or down the template.
The text and photo sections are self-explanatory and correspond to the descriptor image, but there are a few special sections that are important to note:
| Section | Description |
| Social |
This section inserts icons that link to your various social media outlets. Available options are Twitter, Facebook, Instagram, LinkedIn, Vimeo, WeChat, Youtube and TikTok. Only sections with a valid link will appear in the email – any that are left blank will not appear. Be sure to include the full url, including http for the links to work. |
| Button |
A button is a styled link and an easy, visual way to highlight a call to action for email recipients. It can also be used to direct recipients to sales materials and other files you might like to share. |
| Disclosure Link |
This section is only present for transactional email templates and creates a button with a tracked link to the Disclosure Statement and any Amendments that have been uploaded. |
| Opt In |
The Opt In section creates a button with a link for recipients to explicitly opt in to future communications. Note: This section is not available on transactional email templates. |
| Spacer |
The spacer inserts space between other sections. The height can be adjusted by hovering over the border until the adjustor arrow appears and then dragging the border until the desired height is reached. |
| Open Content Text |
This section allows team members to send personalized emails within a template design. This allows maximum flexibility for unique message content while maintaining a branded experience for recipients. Note: Templates containing an open content text widget are meant for one-to-one emails and cannot be used in email campaigns. |
Once you’ve added the desired sections, customize your email content. Drag and drop into the Photo sections (or search your device) to upload your images and enter the desired content in the text sections. To apply formatting, use the text editor at the top of the page or edit the section settings.
Using Tags
Whether you are creating a template for a marketing e-blast campaign, a one-to-one sales email or a transactional email such as a deposit reminder, using tags to merge key information saves your team time and minimizes the opportunity to introduce typos and data errors in your email.
Most of the tags are reasonably self-explanatory and correspond with the fields of the same names on the contact’s profile. There are, however, a few very important things to keep in mind:
- Template Category
When you are creating a new template, keep in mind that tags are most extensive in templates belonging to the Contract category and are much more limited in the Marketing and RSVP categories. - Recipient vs. Purchaser vs. Agent
Tags without a Purchaser or Agent prefix will merge as appropriate for the email recipient. Tags with a Purchaser prefix will merge the specified field for that Purchaser, and tags with an Agent prefix will do likewise for that Agent. For example, Purchaser 1 will merge information for the primary purchaser, Purchaser 2 for the secondary purchaser etc.
Click here for a sample email template describing some of the most commonly used sections and their settings.
Email Template Section Settings
Each section also has its own settings, which you can adjust by clicking on the section and changing the values in the menu that appears on the left.
| Name | Section(s) | Description |
| Padding |
Photo |
Adjusts the spacing between the section content and border. |
| Text Color |
Photo |
Defines the default text color for the section. You can also highlight and color individual words within the section using the text editor that spans the top of the page. |
| Background Color |
Photo |
Specify a background color for the section. Each section can have a different background color. |
| Full Width Background |
Photo |
Causes the background color to span the entire width of the page instead of the standard 600px template width. |
| Line Height |
Text |
Defines the spacing in multi-line text. The larger the number, the greater the space between lines. |
| Icon Theme | Social |
Choose between black icons, color icons or white icons. |
| Button Text | Button |
Customize the message within a button - for example, “View 2 Bedroom Floorplans.” |
| Button Link | Button |
Where the button should lead. Using the previous example, the button link should connect to a webpage displaying 2 bed floorplans (this could be hosted within Spark or it could lead to an external source such as Dropbox or any other webpage) |
| Open in a new window? | Button |
If selected, the link will open in a new window when clicked. |
| Round Corners | Button |
Determines how sharp or rounded the button corners are. 0px yields sharp, 90° corners; the larger the number, the more rounded the button corners will be. |
| Font Family | Button |
Select the button text typeface. |
| Font Size | Button |
Select the button text size. |
| Font Weight | Button |
Select the button text line weight. Smaller numbers produce a thinner line and larger numbers produce a bolder line. |
| Full Width Button | Button |
If selected, the button will span the width of the template (600px) instead of auto-adjusting based on the text length. |
| Alignment | Button |
If the button is not full-width, select left, center or right alignment. |
Previewing & Testing Email Templates
To preview an email template within Carpenter, click on the template and then click Preview at the top right. The preview page displays how the email will appear in most email clients. Click Mobile Preview to preview how the template might look scaled for viewing on a mobile device.
To test an email template within Carpenter, click on the template and click Preview to view the preview page. Click Test at the top right of the page, then enter an address to send the test email and names to populate.
Note: It is best practice to test a new template by sending a small test campaign or email to view the email as it will appear to recipients. This is also a good time to ensure links work as anticipated. If you are concerned about how your email will appear on a variety of browsers using a number of different email clients, consider running the template through an email testing service.
See Email Template Tips for some ways to help build an effective email template.
Watch the Video Tutorial!