Storage Types
To set and adjust storage type, number, size, price, cost and taxes, navigate to Settings → Inventory then select the Storage Types tab. The default storage type is Standard. The default storage type name can be edited, but the type cannot be removed. Additionally, the Standard limit input is disabled as this will always reflect the project total.
Add additional storage types as applicable for your project by clicking the + Storage Unit Type button.
Complete the fields as follows:
| Field Name | Description |
| Name |
The type of storage – common examples include Bicycle Storage, Inside Storage, etc. |
| Limit |
Excluding the Standard type, which is the total number of storage units for the project, the limit is the maximum number of the storage unit type. This number is critical for preventing overselling the storage unit type. For example, if there is a limit of 5 Large units and if these 5 Large units have already been allocated to inventory, team members will not be able to add additional Large units to a contract. |
| Size |
The storage dimensions or area. This is a free-text field for you to enter the value that most makes sense for your project. |
| Price |
The cost to the purchaser. It is important to note that initial prices should be set before creating the storage project total so that any future price changes apply only to newly created storage. If the pricing for previously created storage must be updated, this can be done by mass action on the Storage List. See: Pre-allocated Storage (Inventory) and Storage List for more information. |
| Cost |
The cost paid by the developer. |
| Taxes |
Completing this field requires an existing tax structure in your project settings. The selected tax structure will be automatically applied to storage as it is attached to contracts. If no taxes should be added to storage, leave this field blank. |
Once the changes are complete, click Save Storage Types.
Adding Storage (Inventory)
To add storage to the project, navigate to Settings → Inventory, then click the Storage Types tab. Click + Storage to display the total number of existing storage units for the project and the number of units required to meet the pre-allocation demand. Enter the number of storage units to create. For example, if you anticipate having 120 storage units, enter 120. By default, these will be added to the Standard type, but the number of units for each storage type can be adjusted later (see Storage List).
Should the total number of storage units on your project exceed the pre-allocated demand, the remaining storage units will receive an available status. Using the example above, if you create 120 storage units but only 100 of those are needed to meet pre-allocation demand, those 100 storage units will receive the Pre-allocated status and the remaining 20 will receive the Available status.
If storage numbers, prefixes or suffixes are known at this time and are continuous they can be entered now, starting with the first number in the sequence. You can also specify floor, location and building. If this information is not yet known, it can be entered later.
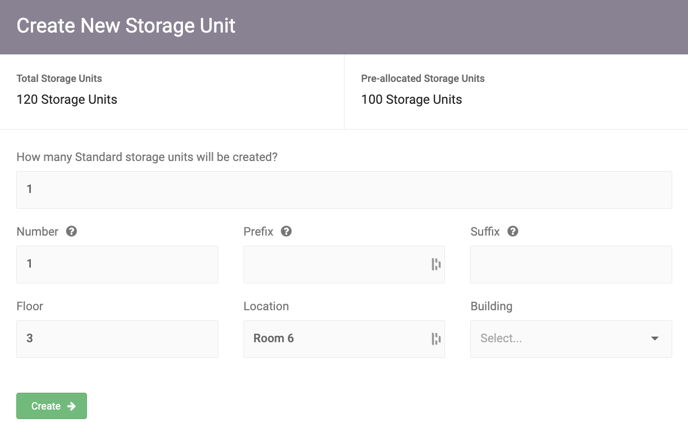
Once the desired information has been entered, click Create.
Note: Storage can also be created from the Storage List. See Storage List for more details.
Storage Upgrades
Storage upgrades can also be tracked within Spark. There are no default storage upgrades, but if your project has storage upgrades, they can be added by navigating to Settings → Inventory and clicking + Storage Upgrade on the Storage Upgrades tab. Similar to storage units, you can set limits, pricing, cost and taxes for storage upgrades. If a limit is set, only that number of storage upgrades will be available for team members to sell. If no limit is set, the upgrade can be sold for all existing storage.
Note: Administrators, Conveyancers and Managers have the ability to add upgrades to storage units via the Storage List and Inventory pages (before contract creation). All other permission roles with contract-writing privileges can add storage upgrades only upon contract creation. This means that upgrades can be applied to the inventory unit (these upgrades stay with the storage unit, even if the contract is rescinded) or to a contract (these upgrades are removed from the storage unit if the contract is rescinded).
Storage Statuses
To review and edit storage statuses, go to Settings → Inventory and click the Storage Statuses tab. There are four default storage statuses that cannot be deleted:
| Status |
Description |
| Pre-Allocated |
Storage units that are assigned to inventory units with no contracts. |
| Available |
Storage units that are not assigned to any inventory unit or contract. |
| Pending |
Storage units assigned to units with contracts that have been sent for signatures or passed the sent date. |
| Allocated |
Storage units assigned to units with contracts that have passed the firm date. |
If the names of the default statuses do not align with your team’s terminology, they can be changed by clicking on them. Similarly, the color associated with each status can be changed by clicking the down arrow to the left of each name and using the color picker. If additional storage statuses are required, click the + Storage Status button to add a new status.